Airbnb - Design photoshoot
V1.0 - 07/04/2022

Airbnb, Inc. est une société américaine qui exploite une place de marché en ligne pour l'hébergement, principalement des séjours chez l'habitant pour la location de vacances et des activités touristiques.
PLANIFIER

How to Schedule your photshoot
When calling the host, be sure to present yourself as an Airbnb photographer.
If the host asks you some question you don't have the answer for, you can redirect him to the Airbnb Host FAQ.
LIVRAISON
Téléchargez seulement des fichiers RAW natifs directement depuis votre appareil (.nef, .arw, .cr2, etc...).
les fichiers DNG ne sont pas acceptés.
Choisissez vos meilleures photos
Téléchargez vos fichiers sur la page de votre Mission.
Après avoir cliqué sur 'Valider la mission', merci de laisser un commentaire pour nous dire comment votre photoshoot s'est déroulé.
Conventions de nommage
Renommez vos fichiers en suivant cette structure: Nomdelamission_City_YYMMDD_
Exemple: 112542541_60ChapelleStreet,FR_211201_.nef
VUE D'ENSEMBLE DU PHOTOSHOOT
Packages
(Vérifiez la page de votre mission pour plus d'informations)
Studio: 12-15 photos
1 Pièce: 15-20 photos
2 Pièces: 20-25 photos
3+ Pièces: 30-35 photos
Types de Photos Clé
Espaces Principaux & autres espaces: Minimum 2 photos droites +1 photo d'angle pour chaque espace
Extérieur: Minimum 1 Photo droite + 1 Photo d'angle
Verticales: Optionnel
Environnement Immédiat: Optionnel
⚠️L'hôte pourra vous demander de prendre des photos additionnelles non inclues dans ces instructions. Faites votre possible pour honorer ces requêtes et laissez un commentaire sur votre tableau de bord OCUS pour nous mettre au courant après votre photoshoot.
NAMING
EQUIPMENT

Appareil Photo Plein Format
Format RAW
ISO max : 800
Evitez une vitesse d'obscuration supérieure à 2s

Objectif 16-50 mm
Ouverture: f/8 - f/16
16-20 mm pour vues d'ensemble larges
35-50 mm pour verticales

Trépied obligatoire
Ajustez votre trépied à 1.25m, la poignée de porte pourra être utilisée comme référence
LUMIERE
Utilisez toujours la lumière naturelle. N'utilisez jamais de flash ou autres lumières artificielles (même indirectes)
Eteignez les lumières intérieures (sauf quand l'espace n'a pas de fenêtres)
Ouvrez les rideaux et volets
⭐️Bracketing obligatoire
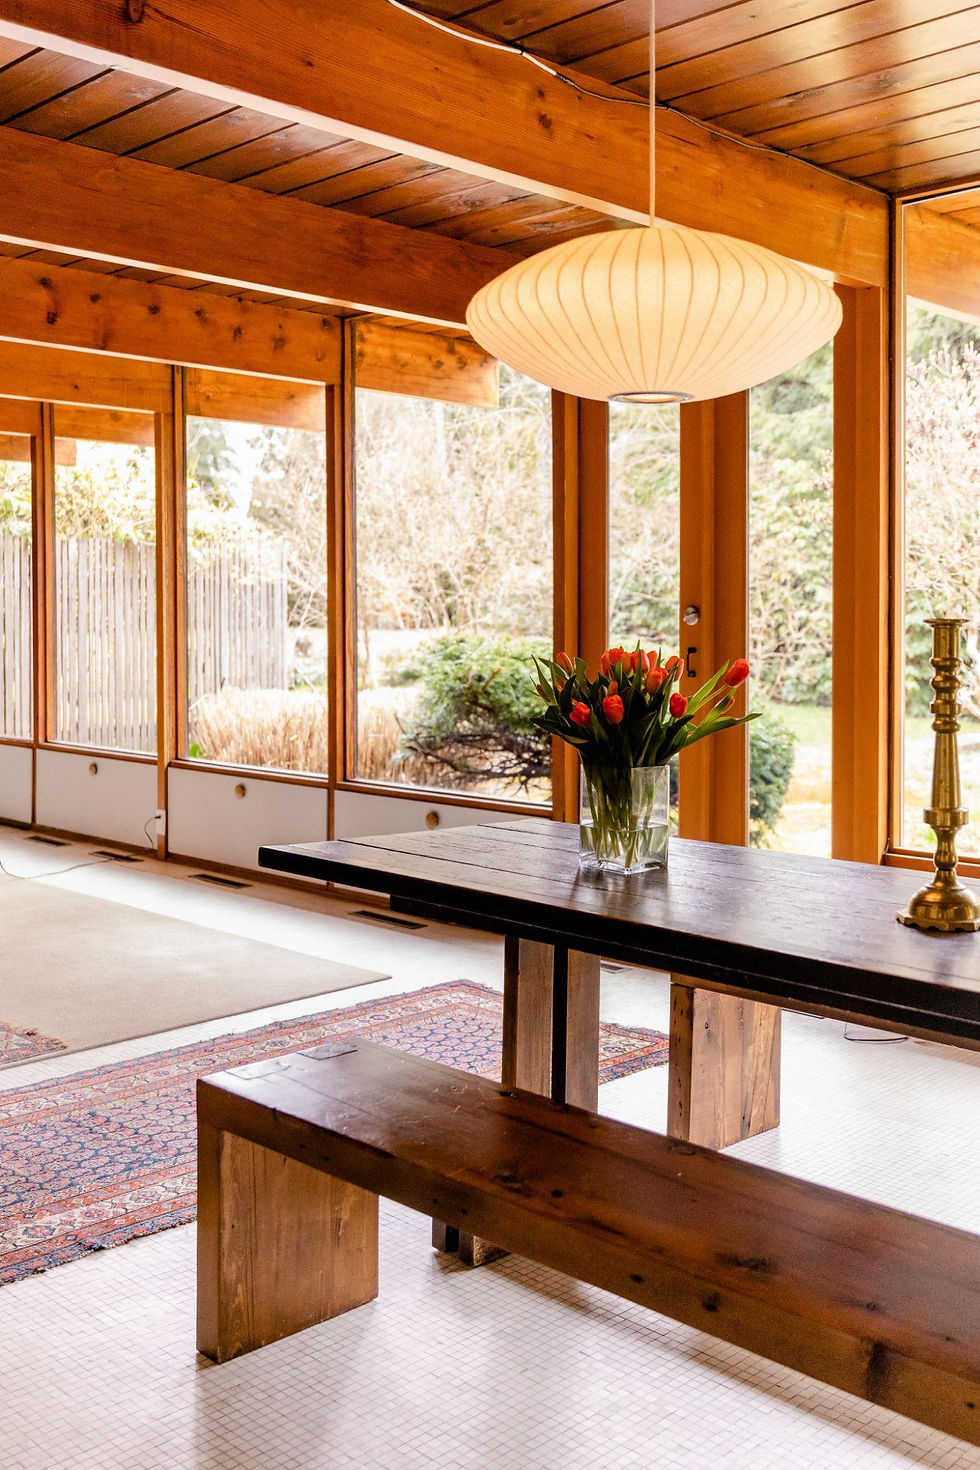
INTERIOR COVERS
Quantity: 3 photos minimum per interior area focus on the design elements
Prioritize the main areas
2 straight-on (Horizontal) + 1 angled (Horizontal) minimum per area
Description
Interior areas
Bedrooms, Kitchen, Living Room, Pool Area, Bathrooms, Dining Room, Patio/Deck/Garden, Hot tub/Spa, Common spaces, Recreation area/Gym, Balcony

Straight-on:
Center your subject (object or the back wall) in the frame
Shoot the room straight from at least two different perspectives


Angled:
Show information about the room layout
Illustrate how a room communicates with the rest of the house


Go Vertical:
Tight spaces can be captured with a combination of straight on, horizontal and vertically angled shots.

Capture instructions
All accessibility features must be shown, especially features for individuals with reduced mobility
Hide all wires and cables
Turn off screens and lights
On beds: make sure there is nothing "hotel-
like" (towels, cards, flowers ...)
Closets should be closed & room doors wide open
Camera settings
Bracketing (3 exposures): -2/0/+2 or -3/0/+3
16 - 20mm
Aperture > f/8 - f/16
Tripod Height: 1.25m
Horizontal/Landscape (vertical can be used in very tight space)


EXTERIOR
Quantity: 2 photos minimum, one from each of 2 angles (straight-on & angled)
Description
You need to capture the facade and the entry of the property/building.

Straight-on:


Angled:


Capture instruction
Open a window or the front door
Turn on the lights inside to illuminate the house
Prioritize straight-on photos
Capture plenty of negative space, emphasizing the nature surrounding exteriors
Center the building in the frame
Camera settings
Bracketing (3 exposures): -2/0/+2 or -3/0/+3
16-50 mm
Aperture > f/8 - f/16
Tripod Height: 1.25m
Horizontal/Landscape


EDITORIAL DETAILS
Quantity: Based on the package, format vertical mandatory
Description
Vertical compositions can be used when meeting interesting details and notable amenities. Capture vertical compositions of special touches within the home that showcase its unique design. These can be details, textures, pieces of art or furniture, and welcoming corners. Capture these at wide, mid, and tight perspectives.


Capture instruction
Verticals should ideally be shot between 35-50mm to avoid distortion and lack of context, but are not close up images
Camera settings
35-50 mm
Aperture > f/8 - f/16
Tripod Height: 1.25m
Vertical/Portrait


Avoid during the photoshoot
Mains & other areas
Do not shoot wider than 16mm
Do not shoot detail or close-ups; try to give context to your photos
Capture the same facility/room from different angles rather than shooting duplicates
Avoid shooting from a high-angle or low-angle view
Try not to plan the photoshoot when weather conditions are not optimal (rainy, snowy, foggy conditions...)
Do not show reflections of people or camera equipment in glass or mirrors
Do not include people or animals in the frame
Avoid picturing brand names
Exterior
Do not frame too tight; the property must be fully in-frame
Avoid cars and road signs whenever possible
Vertical
Vertical photos are not intended to be close-up images of singular objects and do not have to be shot straight on

Remember: Lights Off, Nothing on Beds, Open Curtains + Blinds, Open Doors to Connecting Rooms

Remember: Prioritize Straight On, Provide Context, Avoid Frame Obstructions, Avoid Going Too Wide
TIPS & TRICKS
Bracketing
3 exposures
-2/0+2 or -3/0/+3 in extreme conditions

After OCUS post-production

Camera Height
Balance the visible amount of floor and ceiling
Keep the tripod at around 4ft or 1.25m, the door handles could be used as a reference
Adjust the height of your camera based on the room type. Top surfaces of countertops, beds, tables, and sofas should always be revealed.


X
